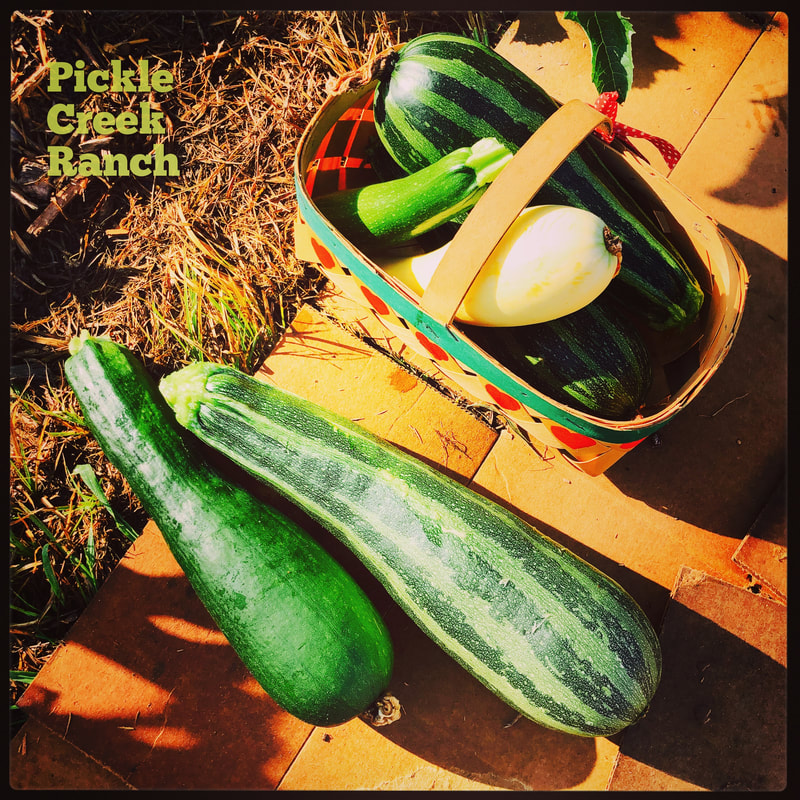
We have had such a productive garden with zucchini, yellow squash and patty pan squash this year!
I find many ways to prepare zucchini. Here are a few:
A. Shred for baking zucchini bread
B. Press through a zoodle maker to pan sear in lieu of noodles
C. Slice down the center and core out for zucchini boats
D. Chop for casseroles or roasting on the grill
E. Slice or chop and add to salads
You can also shred, chop or slice and freeze in zip lock freezer bags to use during the season.
Some of the zucchini get a little big but they are still great for making zoodles and even zucchini boats! In this case I used two large zucchini. You can use smaller ones so I will list the ingredients as if you had medium size.
Gifts from the Garden
INGREDIENTS
2 tbsp Basil, fresh leaves
1 tbsp Garlic
2 tbsp Parsley, fresh leaves
6 Zucchini, medium
1 tsp. salt
1 tsp. freshly ground black pepper
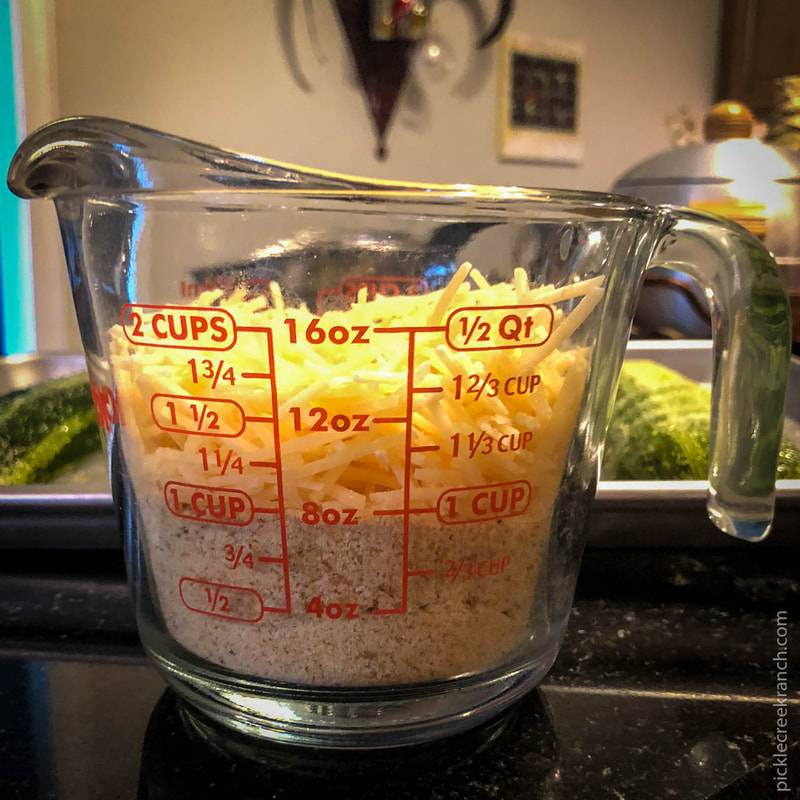
1/2 cup bread crumbs
1/2 cup Parmesan cheese
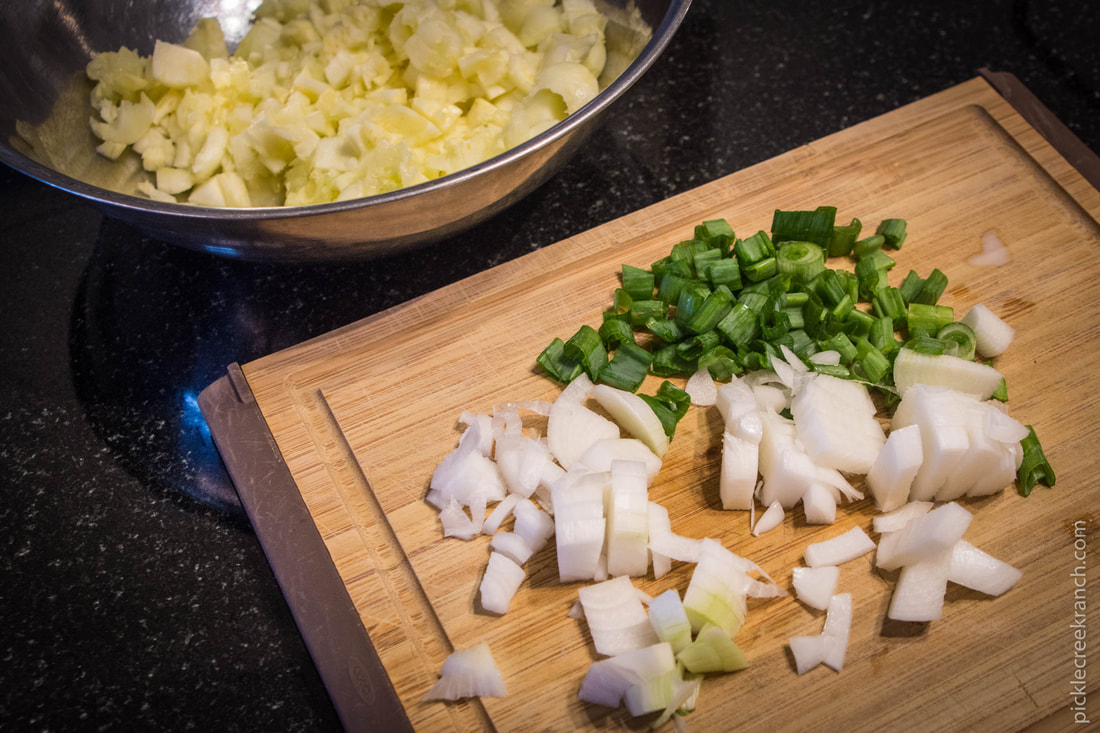
1/2 onion, chopped or any variety of onion, green onion tops too
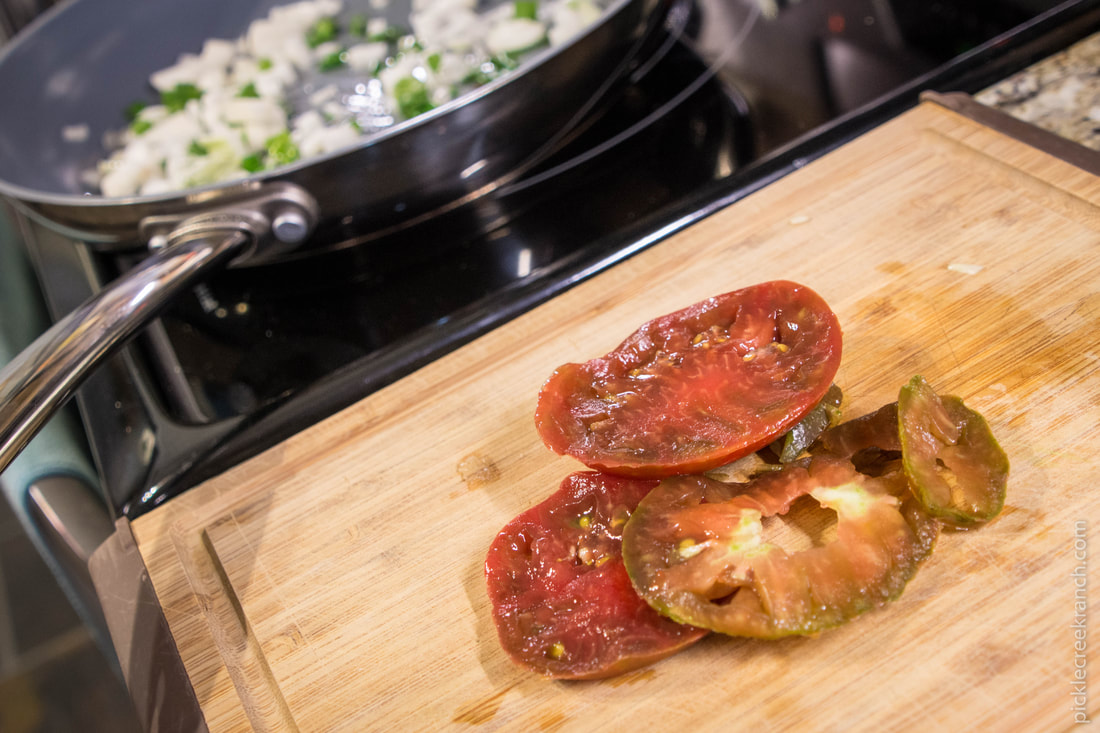
1/2 tomato, chopped
Cold Pressed Extra Virgin Olive oil
INSTRUCTIONS
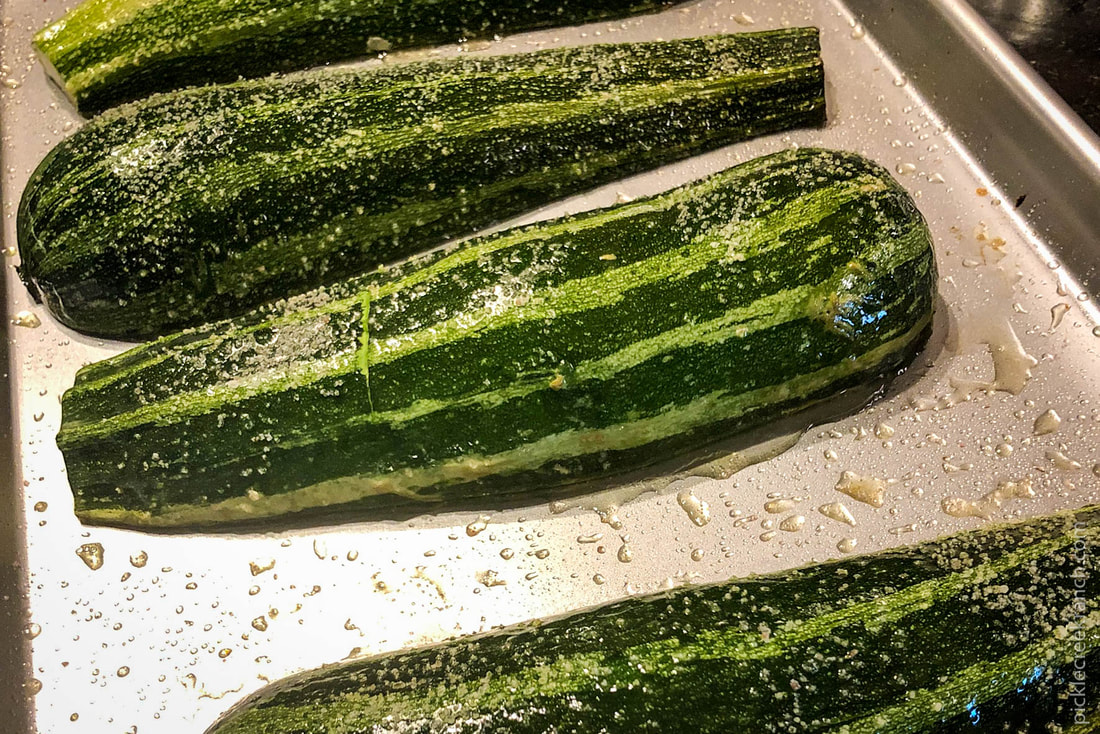
Preheat the oven to 425°F
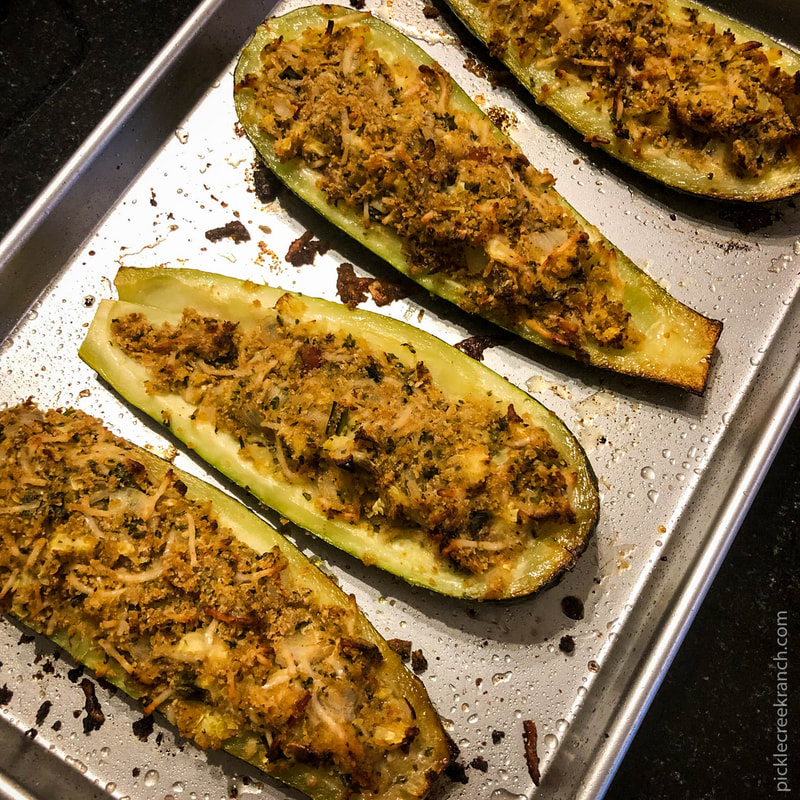
Trim the stem end of the zucchini and slice down the center, lengthwise. Score and scoop out the center leaving a half to 3/4 inch. I used a melon ball scooper. These did not have large seeds so no need to discard seeds. Set aside.
2 tbsp Basil, fresh leaves
1 tbsp Garlic
2 tbsp Parsley, fresh leaves
6 Zucchini, medium
1 tsp. salt
1 tsp. freshly ground black pepper
1/2 cup bread crumbs
1/2 cup Parmesan cheese
1/2 onion, chopped or any variety of onion, green onion tops too
1/2 tomato, chopped
Cold Pressed Extra Virgin Olive oil
INSTRUCTIONS
Preheat the oven to 425°F
Trim the stem end of the zucchini and slice down the center, lengthwise. Score and scoop out the center leaving a half to 3/4 inch. I used a melon ball scooper. These did not have large seeds so no need to discard seeds. Set aside.
 |  |
Drizzle olive oil and brush all over zucchini. Place face down on the pan. sprinkle with salt and roast for 12 to 15 minutes until tender but firm.
Meanwhile, sauté the onion in olive oil, add the zucchini, tomatoes, basil and garlic and cook till tender. Let cool for a bit.
 |  | 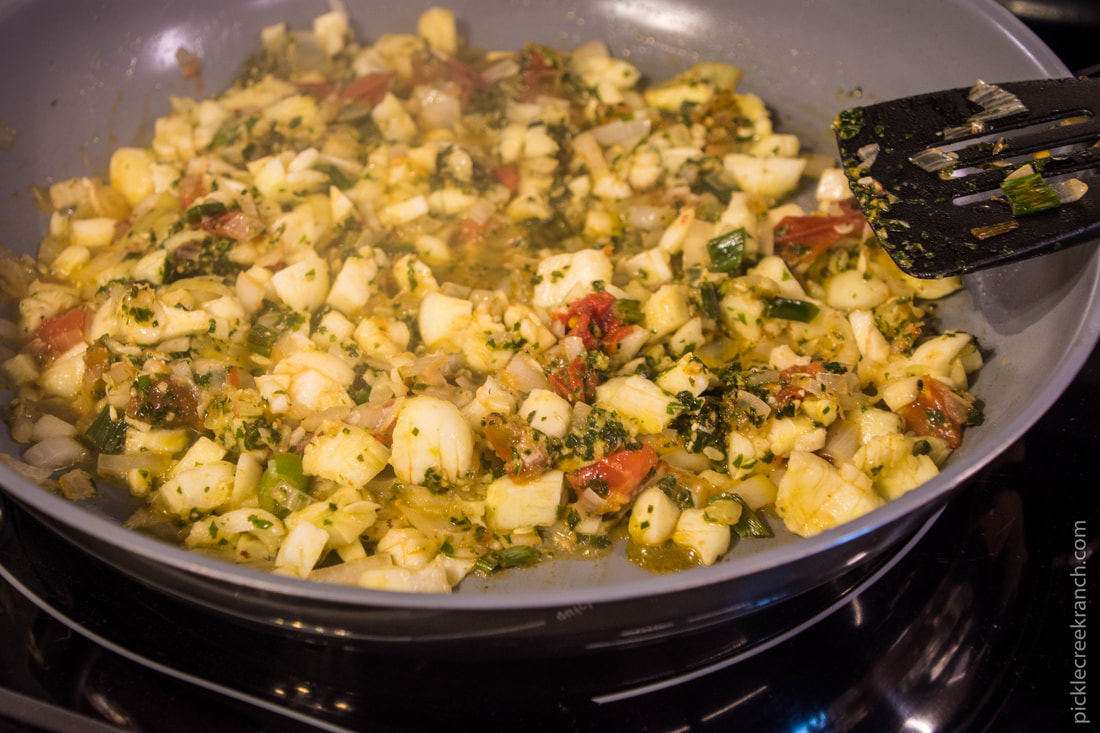 |
In a medium size bowl, add 1/2 cup bread crumbs and 1/2 cup Parmesan cheese (I put both in a 1 cup measuring cup); fold in the sautéed vegetables.
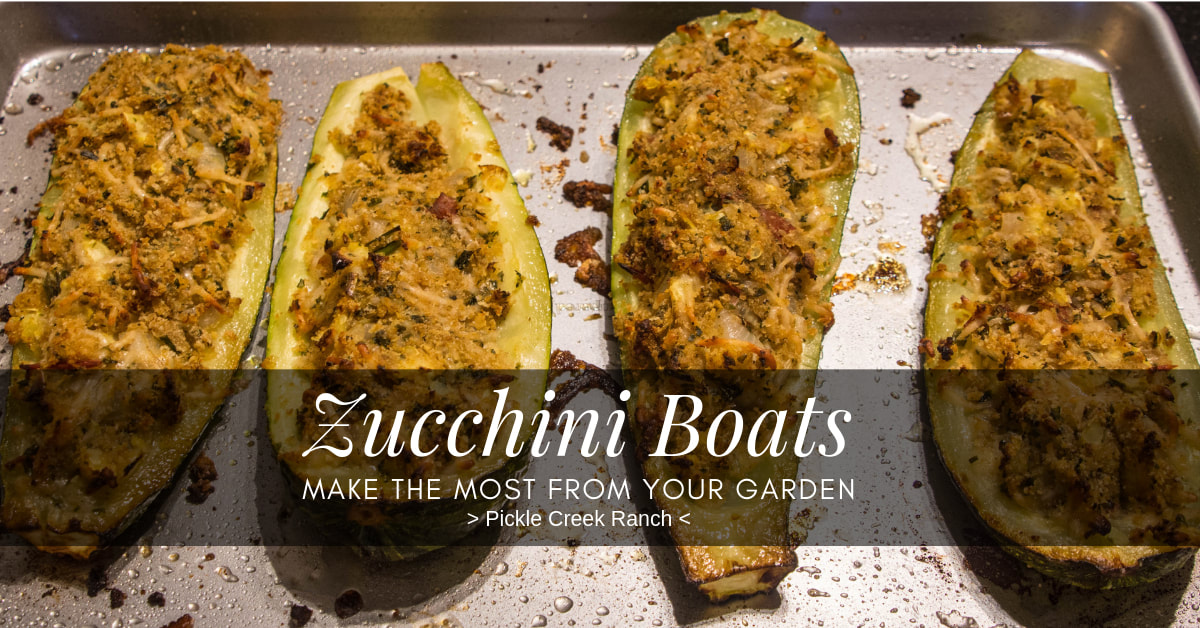
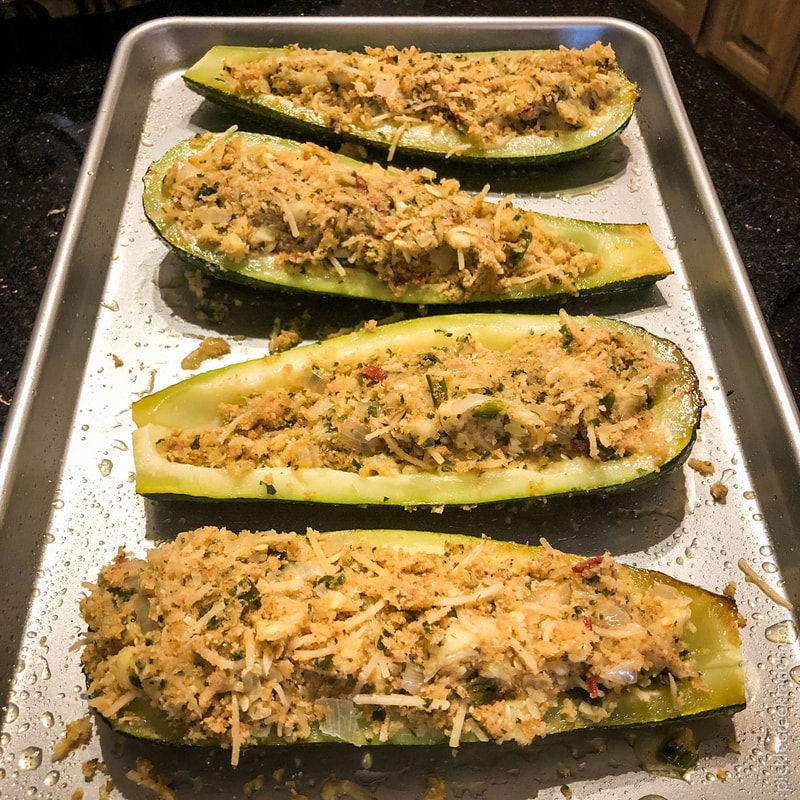
Pull the zucchini out of the oven and turn it cut side up. Spoon in the mixture you have prepared, put back in to the oven and bake for another 8 - 10 minutes till mixture is crispy golden brown.
Pull the zucchini out of the oven and turn it cut side up. Spoon in the mixture you have prepared, put back in to the oven and bake for another 8 - 10 minutes till mixture is crispy golden brown.
 |  |
We enjoyed this a lot the first night. As much as we like leftovers, I would not recommend this for leftovers, but if I transform them into something else, I'll let ya know!
| I hope you like this recipe! Cheryl @ Pickle Creek Ranch picklecreekranch.com essenty.com/cherylintexas |  |


 RSS Feed